
The Complete Tick Bite Protocol: A Step-by-Step Guide to Protecting Your Family
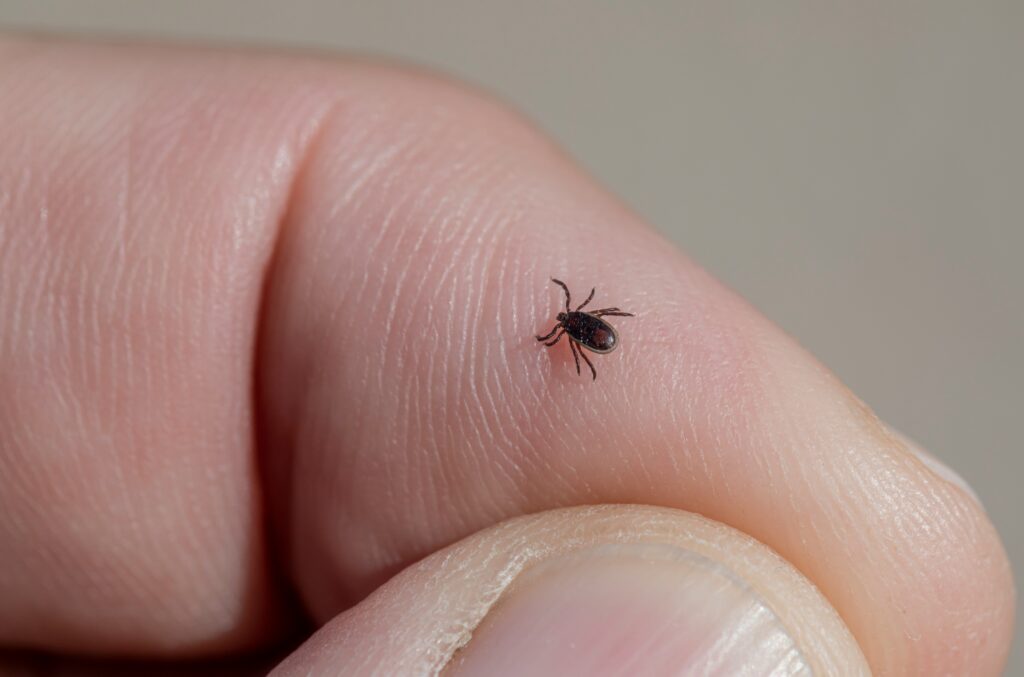
Tick season is here, and knowing exactly what to do when you find a tick attached to your skin can make all the difference. Removing a tick within 24 hours significantly reduces the risk of contracting tick-borne illnesses, especially Lyme disease. This comprehensive tick bite protocol will walk you through every step from discovery to follow-up care.
You can shop my go to tick removal supplies HERE
Printable protocol HERE
Disclaimer
The following is not medical advice. It is intended for informational purposes only. Always consult with a healthcare professional for medical concerns.
Step 1: Thorough Tick Checks
Before you can remove a tick, you need to find it. Ticks are sneaky creatures that love to hide in warm, protected areas of the body.
Where to Check
Be sure to check these common tick hiding spots:
Hair and scalp
Behind the ears
Along underwear lines
Along sock lines
Armpits
Behind the knees
Groin area
Belly button
Regular tick checks after spending time outdoors are essential, especially during peak tick season from spring through fall.
Step 2: Proper Tick Removal Technique
How you remove a tick matters. Improper removal can increase your risk of infection or leave parts of the tick embedded in your skin.
What You’ll Need
Sharp, angled tweezers (specialized tick removal tools work even better)
Removal Process
Grasp the tick as close to the skin’s surface as possible with your tweezers.
Pull upward with steady, firm pressure. Do not jerk or twist the tick.
Remove slowly, not too fast, being sure to remove the head completely.
Never squeeze the tick’s body, as this can push infected fluid into the bite wound.
Do not use heat, petroleum jelly, or other folk remedies. These methods are ineffective and can cause the tick to regurgitate into the wound.
Step 3: Storage for Potential Testing
Don’t throw that tick away just yet. Proper storage allows you to have it tested if symptoms develop later.
How to Store the Tick
Place the tick in a small plastic bag.
Label the bag with the family member’s name and the date of the bite.
Store the bag in the freezer.
Keep the tick for at least 30 days. You will send it out for testing only if signs of illness are present within 30 days of the bite.
Step 4: Cleaning and Natural Treatment
Once the tick is removed and stored, it’s time to clean and treat the bite area.
Initial Cleaning
Clean the bite area thoroughly with soap and water.
Wash your hands well after handling the tick.
Natural Topical Treatment
Apply a bentonite clay and andrographis paste directly to the bite location. These natural ingredients draw out impurities and provide antimicrobial and anti-inflammatory benefits, aiding in the healing process.
Leave the paste on the bite area.
Reapply as needed over the next 24 hours.
Step 5: Homeopathic Support with Ledum
Ledum is a natural, supportive measure to reduce the likelihood of infection or inflammation following a tick bite.
Dosage Protocol
Give 2 Ledum 30c tablets immediately after tick removal.
Allow the tablets to dissolve under the tongue.
Repeat this process 2-3 times a day for 24 hours.
Please do your own research depending on age and individual circumstances. Dosages may vary based on the person’s age and health status.
Step 6: Monitor the Bite Site
Vigilant monitoring is crucial for catching any signs of infection or tick-borne illness early.
What to Do
Check the bite site every 24 hours for at least 30 days.
Look for expanding redness, rash (especially a bull’s-eye pattern), swelling, or warmth.
Monitor for systemic symptoms like fever, fatigue, headache, muscle aches, or joint pain.
Document any changes with photos and notes.
When and Where to Test
If you notice signs of illness within 30 days of the tick bite, it’s time to have the tick tested.
Reputable Testing Labs
Tick Report: tickreport.com
Tick Check: tickcheck.com
IGeneX Labs: igenex.com
These labs can identify the tick species and test for various tick-borne pathogens including Lyme disease, anaplasmosis, babesiosis, and others.
Essential Tick Removal Supplies to Keep on Hand
Being prepared makes tick removal much easier and safer. Stock these items in your first aid kit:
Fine-tipped or angled tweezers or specialized tick removal tool
Small plastic bags for storage
Permanent marker for labeling
Rubbing alcohol for disinfection
Bentonite clay
Andrographis powder or extract
Ledum 30c homeopathic tablets
Soap and clean water
Antiseptic wipes
Important Note: How to Properly Dispose of Ticks
Ticks are not easy to kill. You cannot simply flush them down the toilet or crush them with your fingers.
Safe Disposal Methods
Drown them in a cup of rubbing alcohol.
Burn them (if safe to do so in your location).
Place them on a piece of tape, fold the tape over to trap them, and they will die. This is the simplest solution when out and about if you find one.
Never crush a tick with your bare fingers, as this can expose you to any pathogens the tick is carrying.
Prevention: Your First Line of Defense
While this protocol focuses on what to do after a tick bite, prevention is always preferable.
Prevention Tips
Wear long sleeves and long pants when hiking or in wooded areas.
Tuck pants into socks.
Use tick repellents containing DEET or picaridin on skin.
Treat clothing with permethrin.
Stay on cleared trails and avoid brushy areas.
Perform tick checks immediately after coming indoors.
Shower within two hours of being outdoors.
Put outdoor clothing in the dryer on high heat for 10 minutes to kill any hitchhiking ticks.
Signs of Tick-Borne Illness to Watch For
Even with prompt removal and treatment, it’s important to know what symptoms might indicate a tick-borne infection.
Early Warning Signs
Bull’s-eye rash (erythema migrans)
Expanding redness around the bite
Fever and chills
Headache
Fatigue
Muscle and joint aches
Swollen lymph nodes
If you experience any of these symptoms within 30 days of a tick bite, contact your healthcare provider immediately and have the tick tested.
Final Thoughts
Tick bites are common, but they don’t have to be dangerous. With this comprehensive tick bite protocol, you’re equipped to handle tick encounters confidently and effectively. Remember that early removal is key, with removing a tick within 24 hours significantly reducing your risk of contracting Lyme disease and other tick-borne illnesses.
Keep your tick removal supplies readily accessible, perform regular tick checks after outdoor activities, and don’t hesitate to seek medical attention if you develop concerning symptoms. By following these steps and staying vigilant, you can protect yourself and your family from the potential complications of tick-borne diseases.
If you’re looking for more natural ways to support your family’s health and the overall wellness of your home, join us inside The Collective!
